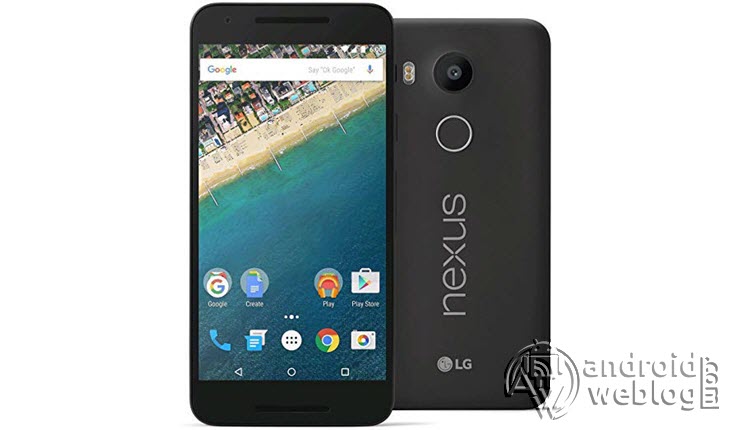
Install Pixel Experience ROM on LG Google Nexus 5X [Android 10.0.0]
Those who want to flash their LG Google Nexus 5X device with Android 10.0.0 Custom ROM, then here is a good news. Those who have been wondering to install the latest Stock ROM Firmware on your device, can now rejoice as they can flash the latest Android 10.0 Pixel Experience Custom ROM software on their device.
So, if you own a Google Nexus 5X, you can install the latest update for your device, which comes with Pixel Experience, that is based on Android 10.0. The update often aims to increase system stability and increase the performance of the device, as well as incorporating new features.
Table of Contents
Brief Intro to Pixel Experience
Pixel Experience is one of the best, most complete AOSP based ROM, which comes with in-built Google Apps, Pixel Launcher, Wallpapers, Icons, Fonts, and boot animation. The Pixel Experience Rom provides stability and security, along with various useful features.


What’s working:
- Wi-Fi
- RIL
- Mobile Data
- Camera
- Flashlight
- Bluetooth
- Fingerprint Reader
- Gestures
- Sound / Vibration
- Now Playing
What’s not working:
- Hotspot
- Video playback
- GPS
- Encryption
In the below guide, step by step procedure to flash/ install newest Pixel Experience Android 10.0 on Google Nexus 5X. The download link for this Stock ROM has been added to the pre-requisite section. You can simply flash the Custom ROM Firmware .zip or .img file manually through the below guide.
Firmware Details:
Android Version: Android 10.0.0
UI Version: Stock UI
Firmware Versions: Pixel Experience
Model: Google Nexus 5X
Release Date: March 2020
Android security patch level: February 2020
Disclaimer: AndroidWeblog.com covers although everything in a very neat and a processed manner so that our readers get exactly what they want, still there are meager chances of basic issues that may arise out of the listed steps here. Hence it is in sole interest of the user to follow the steps very cautiously so as to stay away from any mishappenings with your device.
Updating or flashing the Stock ROM firmware or Custom ROM firmware updates certainly without any doubt comes with risk to brick device. If you brick the device, while upgrading the firmware of your smartphone, then kindly be in touch with the Official Service center of Motorola near your location. AndroidWeblog.com in no way will be held responsible for warranty void or your bricked device.
Prerequisite
Ensure to check your model number, which must be:
- Google Nexus 5X
You must have to ensure that prior to rooting your phone , you have read thoroughly the disclaimer and you agree to proceed further on your risk.
- Phone Should be Charged
Your phone must be 70% charged atleast else, it may lead to complications sometimes while experimenting. Why to take risk, try to charge it fully.
- Back Up
If you are either going to root your phone or install a Custom ROM, it is a good habit to make a back up of your phone. Make a back up of all your media like images, videos and all on your PC and your contacts on Cloud.
- Enable USB Debugging
You must enable USB debugging option by going in to Settings, Applications and Developer options.
Downloads For Updating Google Nexus 5X
Download platform-tools/ SDK Tools package from Android SDK on PC from here. (Android command line tools> SDK Tools package)
Download Latest Android 10.0.0 Pixel Experience Custom ROM for Google Nexus 5X from here
Download GApps from here (Don’t flash, because already included in Pixel Experience ROM)
How to Manually Flash Google Nexus 5X with Android 10.0 based Pixel Experience Custom ROM
Note: Before you proceed with the below mentioned steps, your device must have TWRP flashed and rooted already.
Step 1: Transfer the downloaded pixel-experience-xxxxxxxx.zip file to the internal storage / SD card of your Google Nexus 5X smartphone.
Step 2: Now, just boot into the recovery. From the TWRP interface, you can optionally backup the Stock ROM. Though, I would recommend to backup the Stock ROM. Because if in case process gets failed, you can flash the Stock ROM.

Step 3: Tap on Install ‘, and then navigate to the file ‘pixel-experience-xxxxxxxx.zip’ and swipe to confirm flash (located at the bottom of the screen). The flashing process of flashing the PixelExperience Custom ROM has been started and will take few seconds to complete.
Congratulations, you have successfully flashed Pixel Experience Custom ROM based on Android 10.0 on your Google Nexus 5X device. If you faced any issue while flashing, then do not hesitate to let’s know in the comments section below.


Flashing worked but after the first boot, every 2 seconds the Google Service Framework crashes with a message box, the phone is unusable.