How to Root XOLO A600 and Install PhilZ Recovery
If you are a owner of a XOLO A600 smartphone, and also want to customize this smartphone, then you have visited the right page.
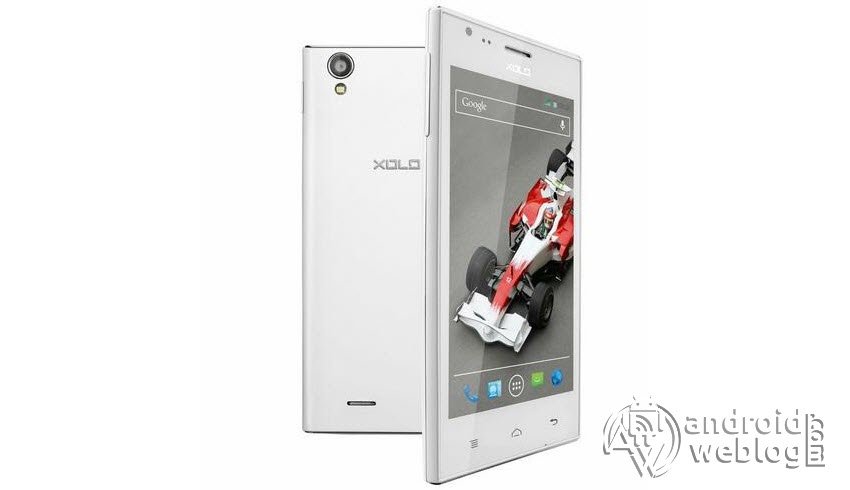
XOLO A600 is the entry level selfie smartphone, which launched with the Android 5.0 Lollipop out of the box. The smartphone is powered by a 1.3GHz quad-core processor, coupled with 1GB of RAM. It primarily comes with the specifications, similar to the hugely popular Xiaomi Redmi 1S. The smartphone has a 5.0-inch LCD touch screen, and come with the 8GB of internal storage, while supporting the expandable storage of up to 32GB. As name suggests, the phone has both 5 megapixels sensors, which means that both of the cameras supports 5 megapixels sensors each. The 2000mAh battery powers the device, and phone lacks most of the sensors, but just equipped with Accelerometer. The design is average, while supporting 3G networks, being an old device. Though the phone is sold in various color options including Blue, Green, Purple, Sky Blue and Yellow. The phone’s display doesn’t offers any screen protection, and the screen offers the very poor pixel density. Though, the matt finishing on the back cover of the device, received a good feedback from the users, but it sadly has a less life, and becomes the dull easily and dust makes it look bad over the time.
If you are an Android Enthusiast, and want to Root and Install PhilZ Touch recovery on your beloved, then you have landed on the right page. In the due course of the article, we will guiding you through the process to install PhilZ Touch and root XOLO A600.
The PhilZ Touch features the material design, and attractive user interface (UI), and by following this guide you can install latest PhilZ Touch for XOLO A600. You can download PhilZ Touch Recovery from the links provided in the pre-requisite section of this article. Kindly note that this is a <official/unofficial> PhilZ Touch recovery and is only for XOLO A600 (Kindly confirm the model by going to Settings>About). The process given below is merely for rooting and installing PhilZ Touch on XOLO A600, do not try out this method on any other device.


If you want to unleash the full potential of the hardware of your XOLO A600, then rooting and flashing the PhilZ Touch is the main concern. The Stock ROMs have often limited and unsupported features in the sense of Customization. When you have a rooted device and also flashed PhilZ Touch recovery, then you are free to install any Custom ROMs, Mods, Kernel, and Xposed etc., as well as many apps which requires root access to work properly.
Table of Contents
Brief Details and Advantage of PhilZ Touch Recovery
PhilZ Touch, just like PhilZ Touch (Team Win Recovery Project) is an open source, CWM (ClockworkMod Recovery Modded) community development project, with expanded features. It works on all Android versions, and and comes with built-in File Manager. It supports SELinux. By flashing the PhilZ Touch, your device will be enabled to install any custom firmware, rooting your smartphone, mod zip files for customizations, Xposed Modules for customized features, one click root and unroot processes. Apart from that, it allows you to take Full Nandroid Backup and restore it later, one click image file flashing, remove bloatware, overclock and underclock. Using PhilZ Touch, one can easily clean Wipe, Cache and Data after flashing any image file to reflect the changes and rectify minor errors due to cache.
For installing the PhilZ Touch, your Condor Condor ALLURE A100 Lite phone must have the Unlocked bootloader. That means you have to firstly unlock the bootloader to root your device as well doing any customization.
Disclaimer: The AndroidWeblog.com covers although everything in a very neat and a processed manner so that our readers get exactly what they want, still there are meager chances of basic issues that may arise out of the listed steps here. Hence it is in sole interest of the user to follow the steps very cautiously so as to stay away from any mishappenings with your device.
Rooting and flashing the Custom ROM firmware, certainly without any doubt voids your devices warranty and AndroidWeblog.com in no way will be held responsible for warranty void or your bricked device.
Prerequiste
Ensure to check your model number, which must be:
- XOLO A600
You must have to ensure that prior to rooting your phone , you have read thoroughly the disclaimer and you agree to proceed further on your risk.
- Phone Should be Charged
Your phone must be 70% charged atleast else, it may lead to complications sometimes while experimenting. Why to take risk, try to charge it fully.
- Back Up
If you are either going to root your phone or install a Custom ROM, it is a good habit to make a back up of your phone. Make a back up of all your media like images, videos and all on your PC and your contacts on Cloud.
- Enable USB Debugging
(Applicable only for PC method, Skip if you will use APK method)
You must enable USB debugging option by going in to Settings, Applications and Developer options.
Downloads For Rooting XOLO A600
Download latest version of FramaRoot APK for Android from here. (Official Link)
Download Mobileuncle Tools (2020 Version)
Download Philz Recovery here.
Procedure to Root XOLO A600 (Without PC with Framaroot APK)
Make sure that you have downloaded the required files (link in pre-requisite section of this article). Then, proceed to the steps.
Step 1 : Make sure that you have data cable near you, and then connect your Micromax device to the computer (Ensure that USB Debugging option was ticked as suggested earlier). Then copy the Framaroot app you downloaded, to the phone.
Note: if you have downloaded the apk directly in the phone, then skip this step.
Step 2: Open file manager on your device, to locate the Framaroot.apks you have downloaded, and then tap on ‘install’ to begin installation of the app. To install the application, you will need to enable installation of apps from unknown sources other than Google Play. Just go to Settings>Security and tick mark the checkbox option Unknown Sources. After doing so, the installation will begin and will take few moments to complete. After the successful installation of the Framaroot apk, you will see the ‘App installed’ message, that indicates that your app installation has been completed successfully.
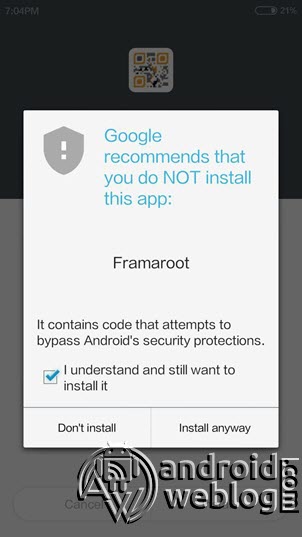
Step 3: Now, after installation, framaroot is ready to root your device. However, on some devices, a error usually appears, which reads that, “Your device seems not vulnerable to exploit included in Framaroot. Kindly note that those devices which are getting this message, are likely unable to get root with Framaroot, and you may need to try another methods, if it fails in the end. But those users, who didn’t got this message, chances to get your devices rooted with Framaroot are pretty high. Simply skip to the next step.
Step 4: Just go to the App Drawer Menu, and then see the Framaroot App icon, and open the same app. Now, the Framaroot interface should display the three options:
- Install SuperSU
- Unroot
- Execute Script
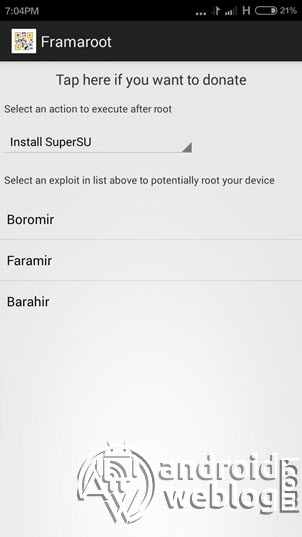
As we want to root at the moment, so select the option SuperSU from menu, and click on Barahir, and the installation for SuperSU app is hereby started. The SuperSU will manage all permissions related to root apps. Now just wait for message Success should appear on the display.
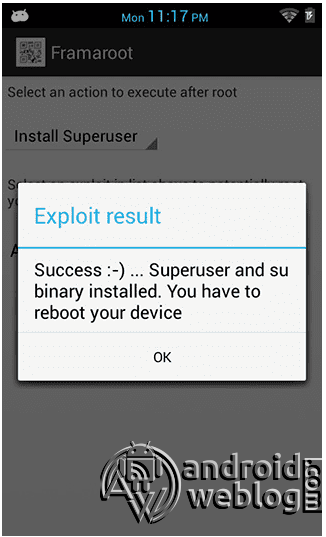
Step 4: Now, just reboot your device, and then your XOLO A600 has been rooted. Don’t forget to click on the ‘Update Binaries’, if the popup appears on the device, after reboot.
As the device has been rooted, now its time to flash the TWRP recovery on the device.
Steps to Flash TWRP Recovery on XOLO A600 Smartphone
Step 1: Download Mobileuncle Tools grant superuser permission.
Step 2: Choose the recovery option, and then place the downloaded recovery (.img) file in root folder of sdcard of the device.
Step 3: Now, navigate to the folder and select the downloaded recovery from the ‘Mobileuncle’ menu.
Step 4: Last step, reboot to the recovery. That’s it.
Congratulations, now you have rooted XOLO A600 and also flashed the PhilZ Touch. Now, you can install Xposed Framework, and customize your smartphone as per your preference. If you wish to verify, you may download and check the Root Status through Root Checker app.